In today’s digital age, effective email management is crucial for both personal and professional communication. Microsoft Outlook is a popular choice for email management, known for its user-friendly interface and powerful features. If you’re an IONOS user and want to streamline your email experience, this article will guide you through the process of connecting your IONOS email accounts to Outlook for Microsoft 365. We will cover essential steps and settings.
Accessing IONOS Webmail
Before integrating your IONOS email with Outlook, make sure you have access to your IONOS webmail account. This is essential for configuring your email settings and ensuring a smooth transition.
How to Setup Email account for the first time
If you are setting up your IONOS email account with Outlook for the first time, follow the steps listed below:-
- When you first open Outlook for Microsoft 365 after installing it, a window will pop up called “Select Profile.” To use the profile already set up, just click “OK.“
If you don’t see a profile name in the field, type in the name you want and then click “OK.“

- Type in your email address.
- Click on “Advanced options.”
- Put a checkmark next to “Let me set up my account manually.”
- Click “Connect.“

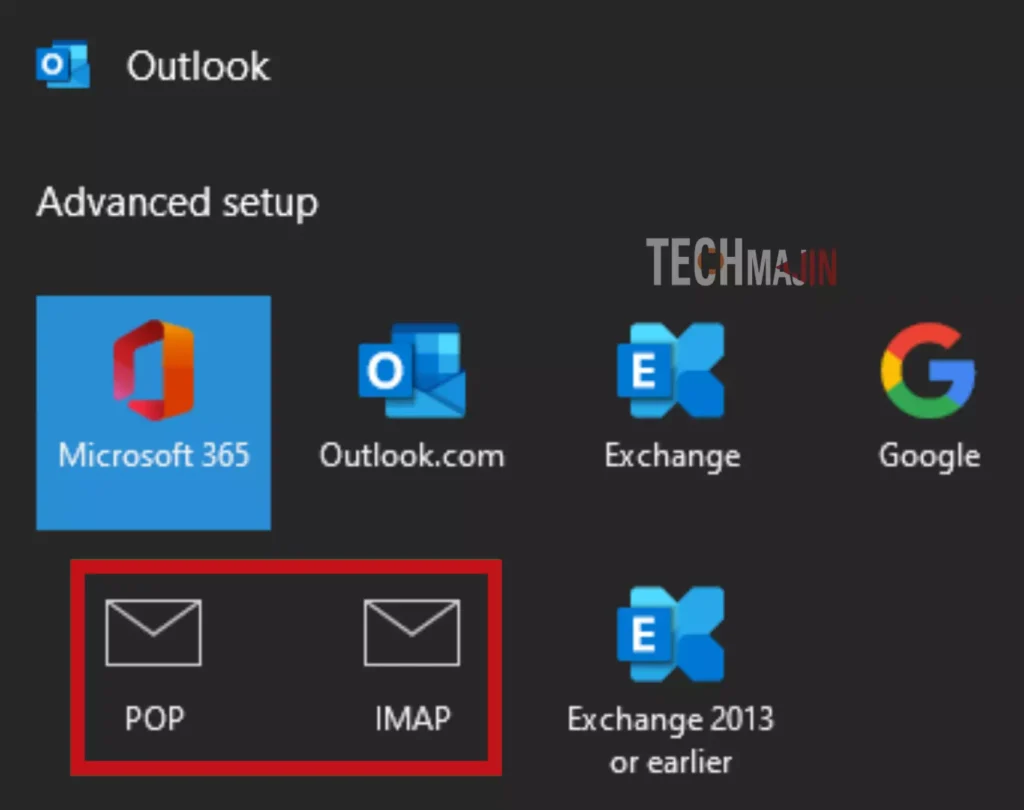
- If you want to get your emails using IMAP (which is recommended), choose “IMAP” as the account type. If you prefer using POP3, choose “POP” as the account type.
- If you’re setting up an IMAP account, type in “imap.ionos.com” as the incoming mail server. In the “Port” field, enter “993” and choose “SSL/TLS” from the Encryption method list.
- If you’re setting up a POP3 account, type in “pop.ionos.com” as the incoming mail server. In the “Port” field, enter “995” and make sure to enable the “Server requires an encrypted connection (SSL/TLS)” option.

- In the Outgoing mail section, type in “smtp.ionos.com” as the outgoing mail server. Then, enter “465” in the Port field and choose “SSL/TLS” from the Encryption method list.

- Click “Next.“
- Enter the password you created for this email address.
- Click “Connect.“

- You’ll see a window that says “Account successfully added.“
- Finally, click “Done.“
How to set up another Email account
If you want to add another IONOS email account to Outlook, here are the steps you need to follow:-
- Open Microsoft Outlook.
- Go to “File” then click on “Info” and choose the option that says “+ Add account.“

- Type in your email address when it asks.
- If you want to customize things, click “Advanced options.“
- Check the box that says “Let me set up my account manually.”
- Click the “Connect” button.
- Decide if you want to use IMAP or POP to get your emails.
- If you pick IMAP, enter “imap.ionos.com” as the incoming mail server. Set the Port to 993 and choose “SSL/TLS” for security.
If you choose POP3, put in “pop.ionos.com” as the incoming mail server. Use Port 995 and turn on the “Server requires an encrypted connection (SSL/TLS)” option.
- For sending emails, enter “smtp.ionos.com” as the outgoing mail server. Use Port 465 and pick “SSL/TLS” for security.
- Click “Next“
- Enter the password you made when you first set up your email address.
- Click “Connect“
You’ll see a message that says “Account successfully added“
- Finally, click “Done” to finish the setup.
Conclusion
In conclusion, connecting your IONOS email accounts to Outlook for Microsoft 365 can significantly enhance your email management experience. By following the steps outlined above, including setting up your IONOS IMAP and SMTP settings, you’ll have seamless access to your IONOS webmail UK accounts within the Outlook interface. This integration allows you to efficiently manage your emails, calendars, and contacts all in one place, streamlining your daily communications and boosting your productivity. So, why wait? Follow these steps today and enjoy the benefits of a unified email management system with Outlook and IONOS.
Read Next:- IONOS Webmail Login 1 and 1 Guide