
The online world offers a lot of opportunities for individuals to showcase their talents, share content, and even monetize their online presence. OnlyFans has emerged as a popular platform for content creators to connect with their fans and generate income. However, to fully unlock the potential of this platform, you need to get verified on OnlyFans. In this article, we will walk you through the OnlyFans verification process and provide valuable insights on how to ensure a smooth verification experience.
Is It Important to Get Verified on OnlyFans
OnlyFans has gained immense popularity as a subscription-based platform that empowers creators to share exclusive content with their subscribers. Whether you’re an artist, musician, fitness enthusiast, or simply someone with unique content to offer, OnlyFans provides a platform to monetize your work. To start earning on OnlyFans, the first step is creating an account, but to access certain features and ensure authenticity, you need to get verified.
Steps to Get Verified on OnlyFans
Getting verified on OnlyFans is a straightforward process, but it’s essential to follow the steps carefully to increase your chances of approval. Here’s a step-by-step guide to help you through the OnlyFans verification process:
1. Sign Up and Complete Your Profile
Before diving into the verification process, you need to create an OnlyFans account.
- Go to the OnlyFans website and click on the “Sign Up” button.
- Now provide the required information, including your email, Name, and password.
- Now, you will receive an account confirmation link on your email account, click on that.
- Once you’ve completed this step, you’ll have a basic OnlyFans account.
2. Verify your Email
After signing up for OnlyFans, you will need to verify your email first before you can verify your profile. You’ll notice a message notifying you to verify your email address.

To verify your email address, you have to sign in to your linked email, where a confirmation email is sent out automatically when you sign up. Click the verification link in the email, to verify your address. If you haven’t received the verification link, or you want to change your address, use the verify email button for that.
3. Customize Your Profile
To increase your chances of getting verified, take some time to customize your profile.
- Upload a profile picture.
- Write a catchy bio.
- Add your location or links to your website.
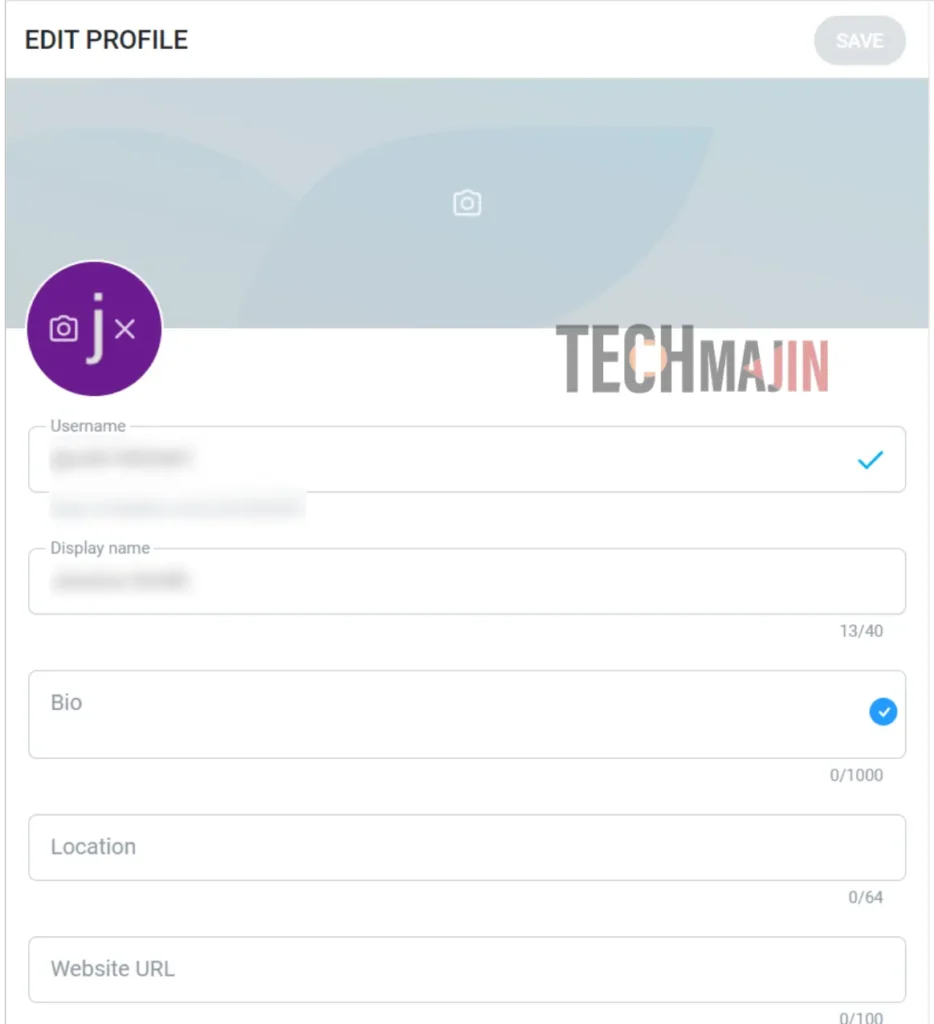
A well-crafted profile demonstrates professionalism and authenticity, which can positively influence the verification process.
Also read:- How to Change OnlyFans Location
4. Provide Personal Information
To verify your identity, OnlyFans requires some personal information.
- Navigate to the “Settings” section of your profile

- Click on “Account.”
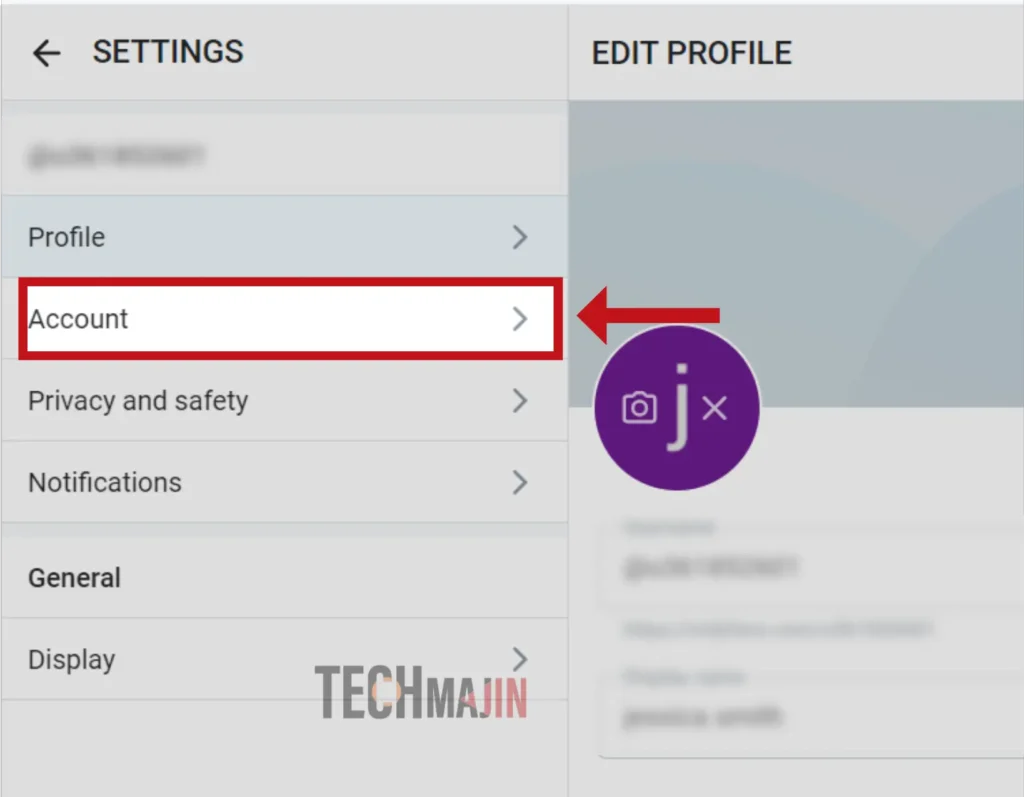
- You’ll find options to enter your phone number, linked account, and email address. You can also connect your other OnlyFans account.

4. Verify Your Identity
Once you have completed your OnlyFans profile, you can proceed towards applying for verification. OnlyFans uses a third-party age verification service to ensure that all users on the platform are of legal age.
- Click on ‘More’ and then click on ‘Become a Creator’.
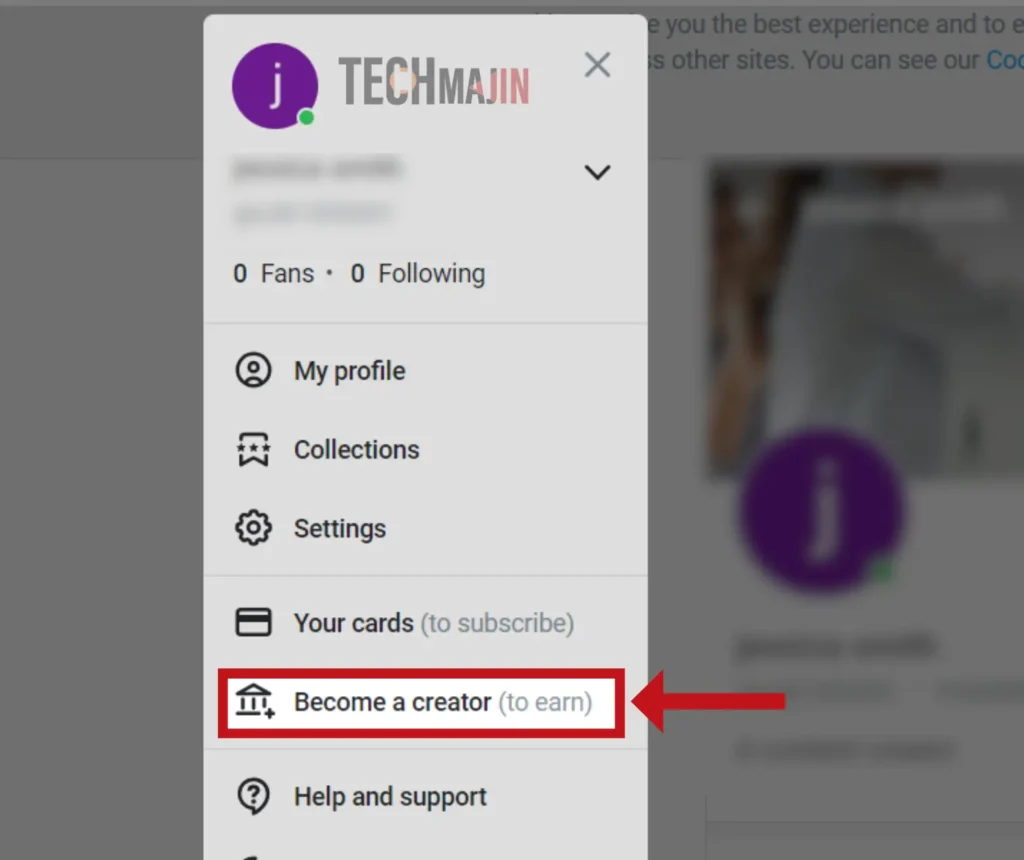
- To complete the verification, you will need to use your mobile device or device with a camera and click on “Complete Verification”.
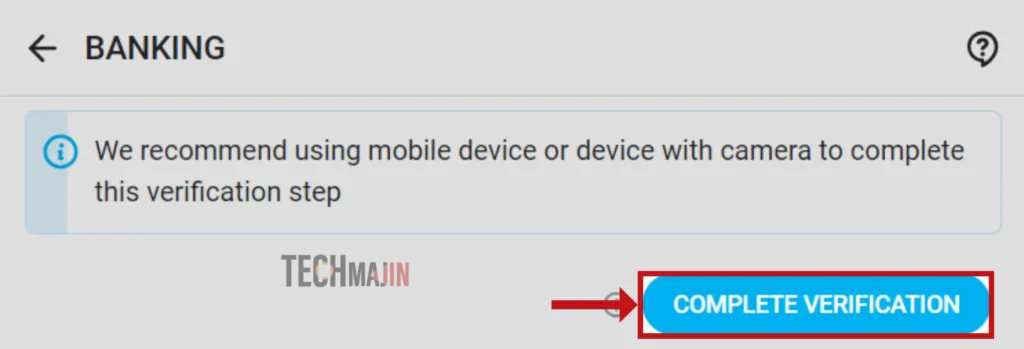
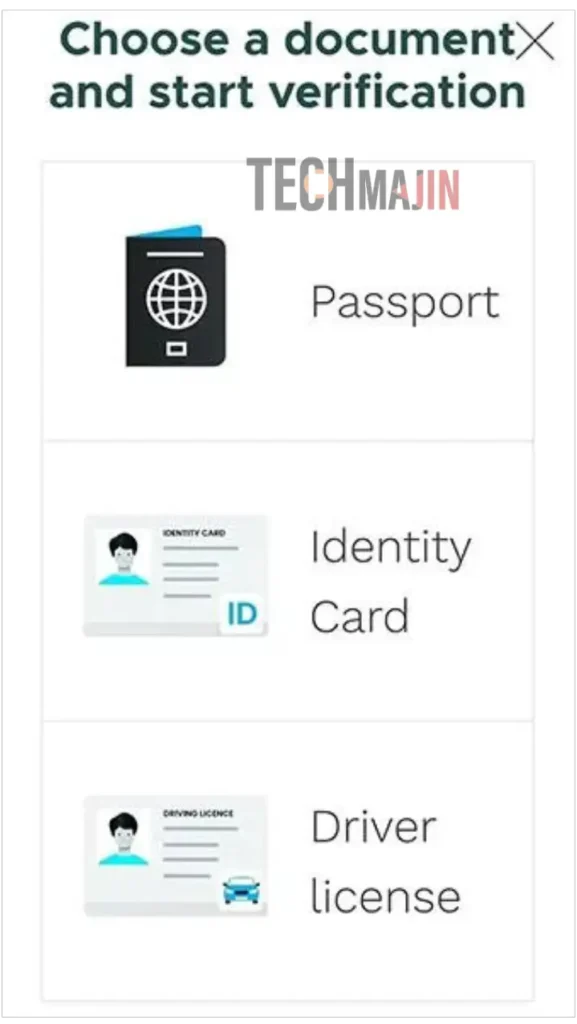
- To complete this step, you will need to provide a photo of your government-issued ID, such as a driver’s license or passport. Follow the prompts on the platform to upload a clear and legible image of your ID.
5. Take a Verification Selfie
Once you’ve uploaded your ID, the next step is to take a verification selfie. This involves taking a clear picture of yourself holding your ID next to your face. Ensure that your face and the details on the ID are clearly visible in the photo.

6. Wait for Approval
After completing all the necessary steps, the OnlyFans team will review your verification submission. The time it takes to receive approval can vary, but it typically takes a few days to a week. After this you need to provide your Bank details, country, state, and Date of birth, to start earning from OnlyFans.

Approval Outcome
Once your verification is processed, you will receive an email notification regarding the outcome. There are three possible outcomes:
1. Approval
If your verification is successful, congratulations! You can now access all the features of OnlyFans, including the ability to set subscription prices, sell additional content, and interact with your subscribers. Moreover, with a verified badge, there are chances to get more subscribers on OnlyFans. This is the outcome most users hope for, as it unlocks the platform’s full potential for income generation.
2. Additional Documentation Required
In some cases, OnlyFans may request additional documentation or information to complete the verification process. If you receive this notification, follow the instructions provided carefully. It may be necessary to provide more details or clarify certain aspects of your submission.
3. Rejection
While rare, there is a possibility of your verification being rejected. This can happen if your submitted documents are unclear, or inaccurate, or if there are discrepancies in the information you provided. If your verification is rejected, you will receive an email with details on why it was not approved. You can then make the necessary corrections and resubmit your verification request.
Why Your OnlyFans Verification Request Got Rejected?
The anticipation of exploring content or generating income on OnlyFans can be thrilling. However, rejection in the verification process can be disheartening. Let’s explore some potential reasons for this setback:
1. Expired ID
One of the most common reasons for verification rejection is an expired ID. Ensure that all the documents you submit are yours and are up-to-date. An expired document will hinder the verification process.
2. Technical Issues
If you experience technical difficulties while uploading your documents or verification selfie, make sure you have a stable internet connection and try using a different browser or device. Clear your browser cache and cookies, and attempt the verification process again.
3. Document Quality
One of the most common reasons for verification rejection is poor document quality. Ensure that your ID and selfie photos are clear, well-lit, and in focus. Avoid using filters or editing tools that may alter the appearance of your documents.
4. Incorrect Information
Double-check the information you provided during registration and in your profile settings. Any inconsistencies or inaccuracies can lead to verification issues. Make sure your legal name, date of birth, and address match your identification documents.
5. Follow-up and Communication
If you encounter difficulties or have questions during the verification process, don’t hesitate to reach out to OnlyFans support. They can provide guidance and assistance to help resolve any issues you may be facing.
Conclusion
Getting verified on OnlyFans is a crucial step for content creators looking to make the most of this platform. By following the outlined steps and ensuring the accuracy and quality of your documentation, you can increase your chances of a smooth verification process. Remember that patience is key, and in the end, successful verification opens up a world of opportunities to connect with your audience and monetize your content on OnlyFans.
FAQs
How Can I Get Approved on OnlyFans?
To secure approval on OnlyFans, you need to follow these steps:
- Confirm your email address.
- Complete your basic profile details.
- Verify your identity.
- Provide your personal information.
- Add your bank account details.
How Long Does the OnlyFans Verification Process Take?
The duration for OnlyFans verification can extend up to 72 hours, but in most cases, you can expect a response within approximately 1 day. Once the verification process is completed, you will receive an email notification regarding the outcome.
Why Does OnlyFans Require an ID for Verification?
OnlyFans mandates the submission of an ID for verification purposes. This measure serves multiple purposes, including:
- Ensuring that individuals under the age of 18 do not access the platform.
- Preventing the upload of stolen or unauthorized content.
- Enhancing the confidence of fans by ensuring the authenticity of creators.
How Does OnlyFans Verify Age?
Age verification on OnlyFans is accomplished by submitting a government-issued document that displays your date of birth. To create an account on OnlyFans, you must be at least 18 years old.
Is OnlyFans Verification a Secure Process?
Yes, the OnlyFans verification process is secure. It is facilitated by Ondato, a specialized company with expertise in online user verification. Rest assured that your sensitive information is handled with the utmost care and security during the verification process.