If you are looking for the installation process for Windows 10 then you are in the right place, In this post, we will tell you how you can make a Bootable USB device and also how to install a window using that USB device.
So, here is the steps follow these steps and install Windows on your Laptop/Computer.
First of all, you need to download the ISO file of Windows 10. To download the ISO file you need to go to Microsoft.com and click the download now button. To download the ISO file click here
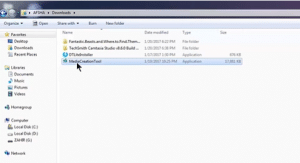
After the download completes, go to the folder where your download file is present and open the media creation tool.
And you have to accept the terms & conditions and hit on accept button.
After that you will get two options:-
You have to select the 2nd option to create installation media for another PC and click on the “Next” button.
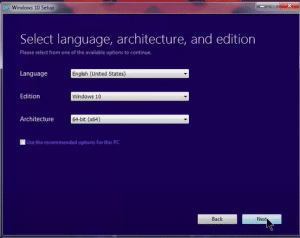
Then, uncheck the box and fill in English (US) language, windows 10, and select Architecture based on your Laptop or PC then hit the “Next” button.
On a new page, you will see two options:-
- USB flash drive
- ISO file
Select the ISO file and click the “Next” button. Then select the path where you place and save the ISO file data and click on save then 3.8GB of ISO file will start downloading. So, it will take time. When the download will complete, Then we will make a Bootable Pendrive.
Benefits of a Bootable Pendrive
As you know very well when modern Laptops came then there was CD & DVD drive within. So, we can install a window very easily by using CD & DVD. But nowadays, you have seen that CD & DVD drives are not present in 90% of Laptops.
The USB slot is available only. Many users prefer a Laptop to use on a daily basis because Laptops are portable and easy to carry anywhere. So, a Bootable Pendrive is necessary nowadays. Here, are the benefits of Bootable Pendrive:-
- The read/write speed of Pendrive is fast as compared to CD & DVD as it allows fast Booting and Operating System installation.
- Also, take less time to prepare a Bootable flash drive.
- Pendrive is convenient to carry around and it allows you to carry your whole OS in your pocket.
FOR MAKING PENDRIVE BOOTABLE
For making Pendrive bootable first, you need to download the software “RUFUS” download here. When the download will complete then launch the software.
Then, open RUFUS 3.14 and insert the Pendrive on Laptop click on YES and then select the device which is your Pendrive and click on the DVD icon on the right side after clicking go ahead and select the ISO file where have your download and click open then hit the start button and click “OK”.
It takes a lot of time depending on your Laptop speed. When the download completes then close the software before removing the Pendrive you change the name of the Pendrive and then remove it. Now, you have successfully created a bootable Pendrive and you can use it for the installation of Windows 10 on any Laptop or Computer.
Let’s, Install the Windows 10 on Laptop
For installing the windows you have to shut down the Laptop first after that connect Pendrive and hit the power button and press f2, f12, or f10 because the different every Laptop has a different bios button. So, by pressing these buttons you will understand which button is for your Laptop.
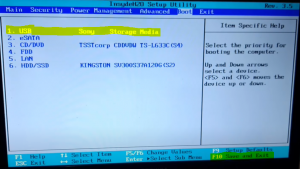
So, if you are in BIOS go to the BOOT menu, and keep in your mind USB is should be on top, for moving the USB up and down press f5 or f6. Now, save & exist setup for save & exist press f10. You have booted into the Windows 10 menus.
So, now let’s install Windows 10.
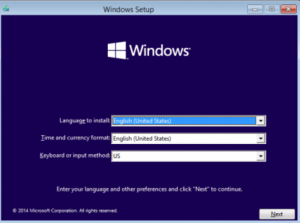
Firstly choose the,
- English-US language
- English-US currency
- US Keyboard
Then, hit the “next “button and click on Install Now button then the setup will start
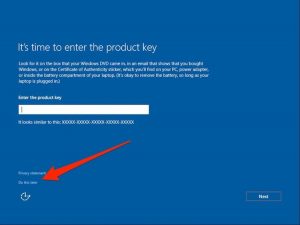
If you have a window Activate key then enter the Product key otherwise select “I don’t have a product key” or “Do this later”.
Then you will see 4 types of Operating Systems:-
- Window 10 Pro
- Window 10 Home
- Window 10 Home Single Language
- Window 10 Education
And select Operating System which is suitable for your Laptop. Then, click on the “Next” button and accept all terms & conditions, and hit the “Next” button.
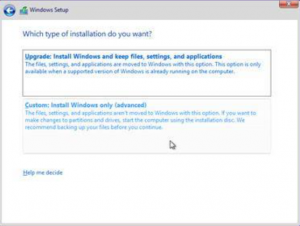
Then, click on Custom: Install window only.
If your drive is full then format it or if you need a partition then do the partition otherwise click on “Next” and now the windows will start to Install, wait for some time. It depends on your computer’s hard drive speed if your hard drive is SSD type then it will take less time.
After Windows will be Installed then your Laptop will restart.
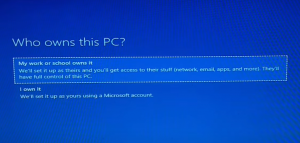
Then, you have to connect your Wi-Fi network and click on “use the express setting”. Then, you will see two options:-
- My work or school owns it.
- I own it.
You should choose randomly as your wish or your work. Then, click “Next”
Now, you need to login into your Microsoft Account. If you have a Microsoft Account then fill otherwise create a New Account.


